

If you have been following along in my stories on Instagram, then you know, I have been working on a special project. If you missed it, let me catch you up. I originally saw this wood wall art from, my friend, Mary, you can find her on Instagram @stanandwally. She sells these signs in her Etsy shop, and they are gorgeous! I knew that her idea would be perfect for the project I had in mind for my step-son, Cody.


To give you some background, I met Cody when he was 9 years old. In my opinion, I won him over when I challenged him to a balloon soccer game in a friends kitchen. I do not remember who won, although, I’m sure it was probably him. I only remember his big smile and thinking that, maybe, I made a good impression. Over the years our relationship evolved. I never pushed myself on him, I let him come to me with his thoughts and questions, about life or whatever was on his mind. It’s tough finding your way as a step-parent, but I think taking it slow, allowing one another the time to trust was the way to go, for us! I like to tell him this quote, “You may not of grown in my stomach, but you grew in my heart!” That about sums up our relationship. Now, flash forward 14 years later, He’s graduating from college and was lucky enough to play baseball through his college career. He is someone that eat, sleeps, and breathes baseball. Always has, and always will! Throughout college he has done some amazing things, and it has all lead up to him breaking 10 all- time career college records. I’m not trying to brag, I’m just extremely proud of him. He has put in the work to earn every one of those records.
Once, I realized that this was happening, I knew I had to do something special to honor his accomplishments. This diy wood wall art is something he can keep and hang in a game room, one day. He can tell his children, about the good ole days. So, now that you have the background of why I’m making this, let me teach you how to make it.
Diy Wood Wall Art – Supplies
- Stainless Steel Sign Standoffs 1 inch x 1/2 inch
- Polycrylic
- Adhesive vinyl or peel-n-stick letters
- Wood glue
Diy Wood Wall Art – Step One
First thing to do is rip the 1×2’s down the middle with a table saw. Make sure to leave at least 2, 1×2’s uncut for the frame around the wall art. Once you have that done, then decide on the design you want to do and the length of the boards you will need. I cut my boards at 6 inches, and it was super easy to do, since I set up a stop on my miter saw. It allowed me to make the same cut, over and over again, without having to measure every time!! Can you say game changer??!!


Diy Wood Wall Art – Step Two
The one thing I learned, after I had finished this project, was how to start my chevron pattern. I thought I had the right idea, but once it was done, the top of the middle section did not line up correctly with the two sides. Now, I do not notice it, but next time I will do it the right way. I learned that you must find the center of the board you are gluing to, and find the center of your 6″ chevron piece. Once you have that, line them up together and that will keep your pattern consistent throughout your piece. I chose to add 3/4″ brad nails to a few of the pieces. In hindsight, I could of used only glue and clamped the starting pieces so they would not move until the glue dried. It would of held fine considering the glue is the real star of the show. If I would not of used nails, then I would not have had to worry about filling holes, which I can never seem to get the putty to match and disappear.


Diy Wood Wall Art – Step Three
Once I let that dry overnight, I came out the next morning to cut the edges so they would be flush. I flipped the wood art over, for a few reasons. First, I am using a circular saw. This saw rotates with the teeth coming up through the piece that is being cut, so if tear out is going to occur, it will happen on the backside of the art. Since that side will be against a wall, no one will see it. Second reason I have the back side up, is because, I can easily see where I need to cut. My circular saw just has to follow along the edge of the hardboard.


Diy Wood Wall Art – Step Four
Sanding was up next. I have a love/hate relationship with sanding. I hate having to do it, mainly because it takes a long time, but I love the finished product. I started with 80 grit sandpaper and moved up from there, to 150, 180, and finished with a 220 grit. The one thing I will suggest to any beginning diyer, is to invest in a good sander. I started with an inexpensive version and the vibration of the sander was something I could feel throughout my entire body. Once I upgraded, to my Dewalt 5-speed Orbital Sander, I never looked back. It’s easy to use and has very little vibration, not to mention, it does a better job sanding than any other one I have used in the past.

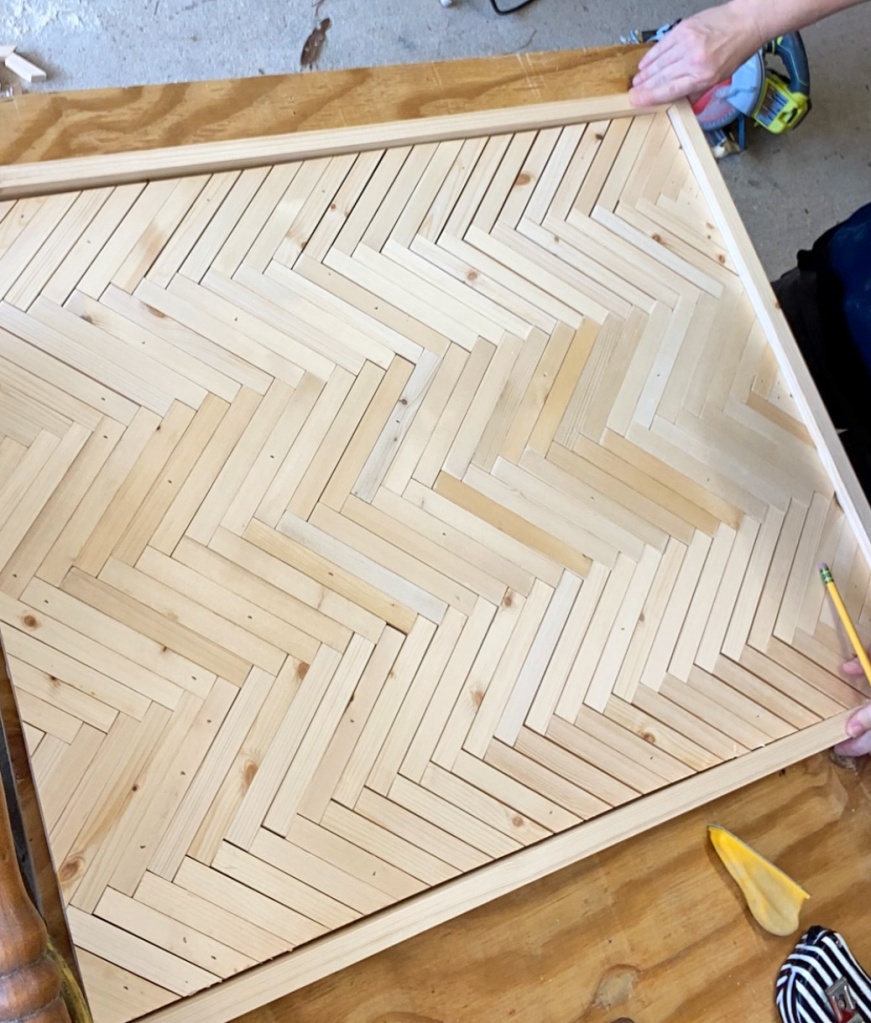
Diy Wood Wall Art – Step Five
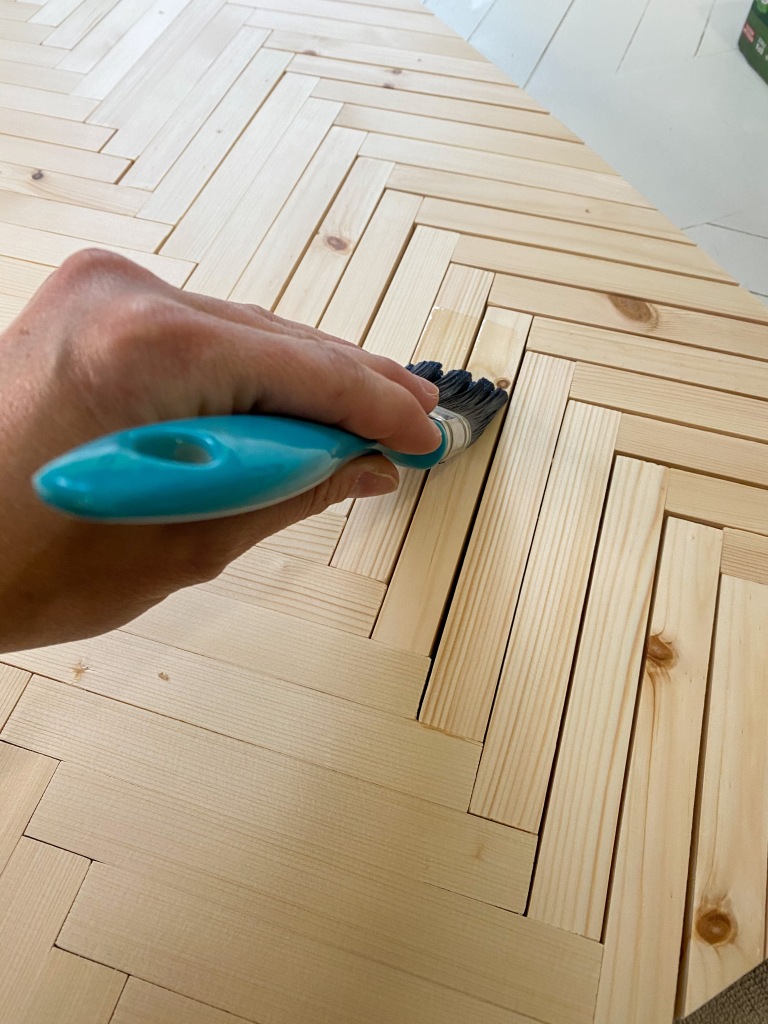
The next step was to make a frame. I used the 1×2’s and had leftovers to make a simple frame with the ends cut at 45 degrees. I then glued and used brad nails to attach it. Finally, I painted it black and protected the frame and chevron front, with a matte polycrylic. Another tip I have for you, is when using any kind of poly, make sure you have a high quality brush. The application will be better, and you will not have to worry about brush hairs falling out into your finish. I may, or may not, be speaking from experience.
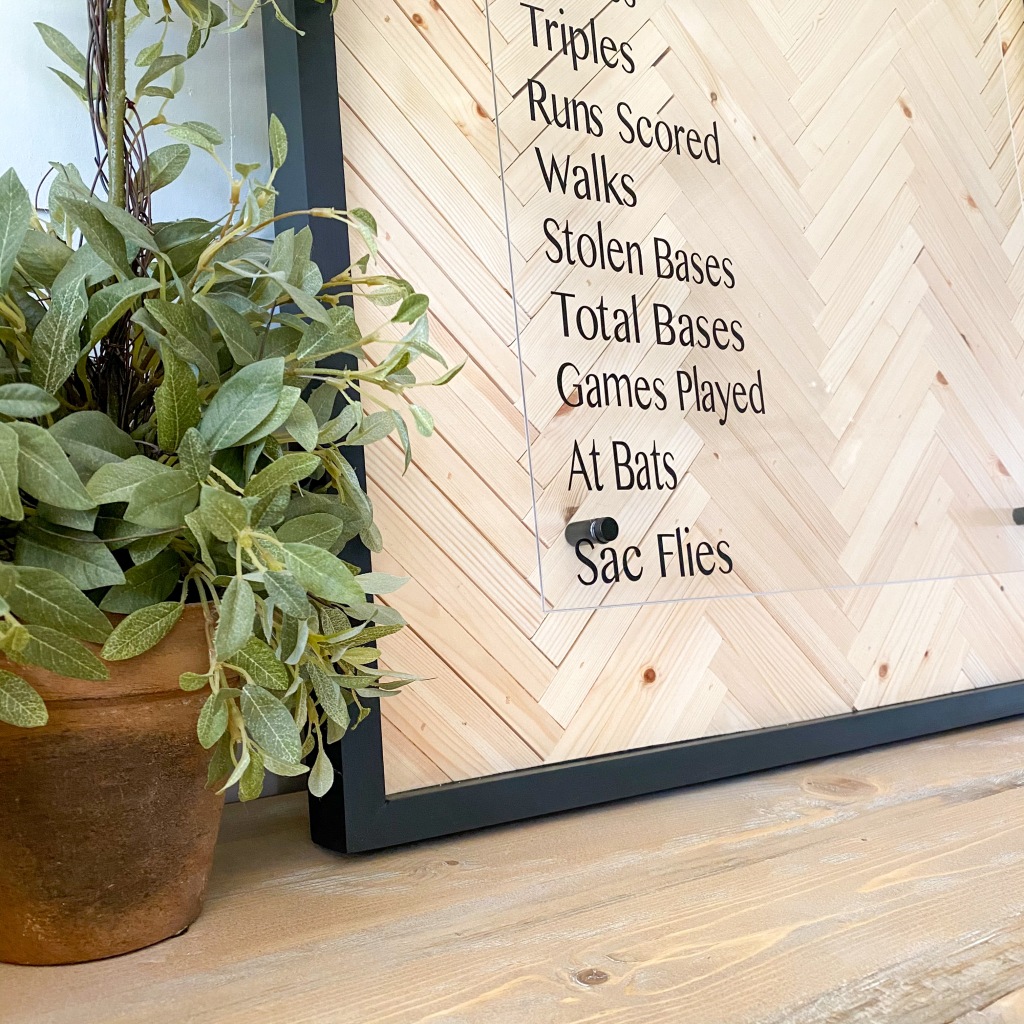
I’m using 1/2″ x 1″ sign stand-offs to attach the plexiglass to the wood art. Mine came in a standard silver color and I new that was not going to work. I have used many spray paints on metal over the years, and inevitably, the paint would rub off. Then I discovered, this primer for metals, and it has been a lifesaver, for sure!! I applied the primer and then sprayed it with a Rustoleum Matte Farmhouse Black. Also, I want to suggest buying a spray handle for spray paint. It will help you keep the paint off your fingers. Trust me, you will thank me later!! Ok, now onto the fun, but also stressful part, the plexiglass.


First, let me say that I cracked the first piece of plexiglass, when I tried drilling the holes with the large drill bit first. Lesson learned! When I got a new piece I started drilling the holes with a smaller bit and then moved to the large one. After I was done with that, Mary (@stanandwally), messaged me and said there is a specific bit for drilling through plexiglass. So, the next time I am using plexiglass for anything I will invest in one of those! I then brought the plexiglass over to the chevron piece and traced the holes where I will be drilling into the wood, this will help everything line up correctly. After drilling pilot holes for the screws to go into easier, it was time to add the vinyl.
Diy Wood Wall Art – Step Six

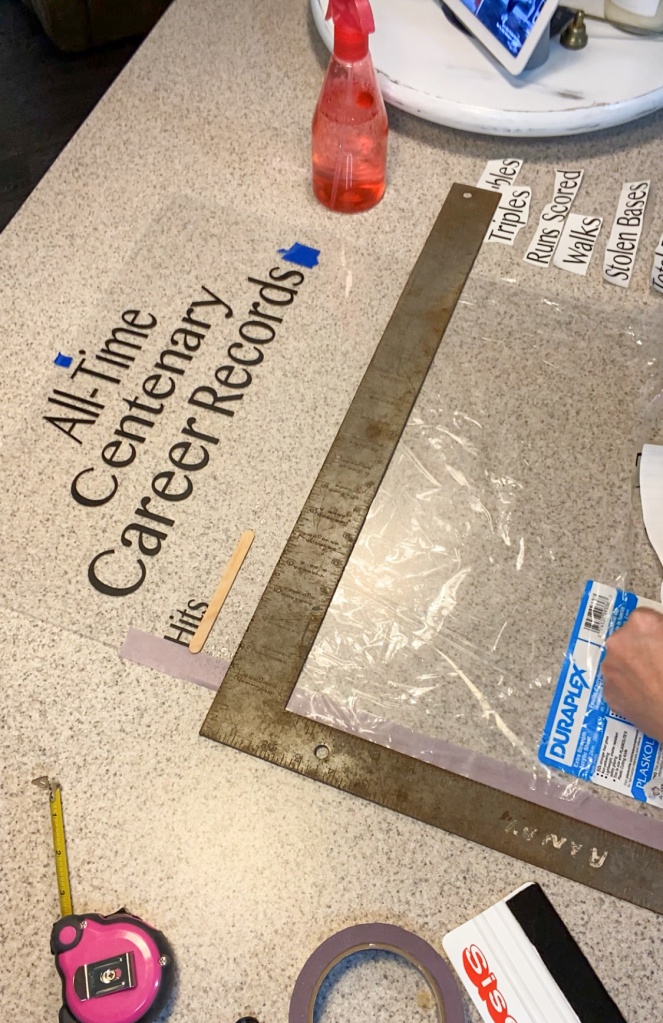
I used my silhouette cameo for this part of the project, but if you do not have one, never fear. Many of the craft stores and Amazon sell vinyl peel-n-stick letters. I was worried about getting the letters in the right place and straight, so I asked my local vinyl shop for any tips they may have to help me. He said to fill a spray bottle with water, add 2 capfuls of rubbing alcohol, and 1 drop of blue dawn dish soap. Yes, it has to be the blue dawn, I asked! LOL! He then told me to spray the plexiglass and the vinyl, which will allow me to move it around as I am placing the letters. Once the vinyl is where I want it, then I used my squeegee and a towel, to drag the water out from under the vinyl, then pat dry. It worked like a dream!!!

Diy Wood Wall Art – Step Seven
The only thing left to do was to attach the plexiglass. I placed it over the base of the sign standoffs, and took each cap and screwed them on gently. I might of had a meltdown if I cracked it at this point, but luckily that did not happen!! Thats it friends!! What do you think? Is this something you think you would try? I would love to know why, or why not, so tell me in the comments. If you are not already, follow me on Instagram, @buildingthecrowders I am there everyday doing diy’s like this, building projects, and full room reno projects. Hope to see you there!!

Thanks for reading and God Bless…
LET’S STAY CONNECTED! Leave your email below, to keep up with what I’m working on. I promise, I will NOT spam you!


Leave a comment